

Taking charge of your testosterone replacement therapy (TRT) by learning to self-inject can be incredibly empowering, but it’s completely normal to feel a bit hesitant at first. This guide is designed to walk you through every single step, making sure you feel confident and prepared. Managing your own treatment puts you squarely in the driver's seat, letting you fit therapy into your life, not the other way around.
The practice of self-administering testosterone isn’t some new trend; in fact, it has become the standard for many men. The global use of testosterone therapy has climbed significantly over the last two decades. In the United States alone, prescriptions nearly tripled between 2001 and 2011.
This growth is largely thanks to greater patient awareness and more accessible, modern treatment options. Today, primary care physicians write over 60% of these prescriptions, and studies consistently show that self-injections are highly effective, restoring hormone levels to a healthy range in 75% to 97% of patients. For a deeper dive, you can find more on these trends and the effectiveness of TRT in published medical research.
What to Expect From This Guide
My goal here is to demystify the entire process, from start to finish. We'll cover all the essential steps in a clear, practical way, so you know exactly what to do.
You'll get the hang of:
- Proper Preparation: How to set up a clean space and correctly draw your medication.
- Injection Sites: Identifying the best locations on your body and why rotating them is so important.
- Injection Technique: Mastering the physical act of injecting for both intramuscular (IM) and subcutaneous (SubQ) methods.
- Aftercare and Disposal: Knowing what to do immediately after and how to safely get rid of your supplies.
Your Self Injection Supply Checklist
Before you do anything else, gathering all your supplies is the first step toward a smooth and safe injection. Having everything organized and ready to go in one place cuts down on stress and helps you build a solid, repeatable routine.
Here’s a quick reference table of all the essential items you'll need to gather before you get started.
| Item | Purpose and Key Considerations |
|---|---|
| Testosterone Vial | Your prescribed medication. Always check the expiration date and make sure the liquid is clear and free of any floating particles. |
| Syringes | The main tool for holding and injecting the medication. Your doctor will specify the right size (e.g., 1mL or 3mL). |
| Drawing Needle | A larger gauge needle (like an 18G) used only to draw testosterone from the vial. This keeps your injection needle perfectly sharp. |
| Injection Needle | A smaller gauge needle (like a 23G or 25G) for the actual injection. The size will depend on whether you’re doing an IM or SubQ shot. |
| Alcohol Prep Pads | You'll use these to sterilize the rubber top of the vial and your skin at the injection site. This is a crucial step for preventing infection. |
| Gauze or Cotton Ball | Handy for applying light pressure to the site after the injection if you see a tiny drop of blood. |
| Sharps Container | An FDA-cleared container for safely disposing of used needles and syringes. This is a non-negotiable safety requirement. |
Having this checklist ready makes the whole process feel less intimidating and more like a simple, manageable task. Once you have everything laid out, you’re ready for the next step.
How to Prepare for a Safe and Successful Injection
Proper preparation for self-injecting testosterone isn't just about following a checklist; it's a ritual that builds confidence and guarantees safety. Think of it like a pilot's pre-flight check. Every single step has a purpose, designed to prevent infection, ensure you’re using the right dose, and make the whole process feel routine. Taking a few extra minutes here can transform a potentially stressful task into a simple, manageable part of your health regimen.

The foundation of a good injection starts with a clean environment. You don't need an operating room, just a dedicated, clutter-free space. A clean countertop in your bathroom or kitchen will work perfectly. Just wipe down the surface and lay out all your supplies on a fresh paper towel. This simple bit of organization minimizes the risk of contamination and keeps everything you need within easy reach.
Setting Up Your Medication
Before you even think about touching a needle, your first move is to wash your hands thoroughly. Use warm water and soap, lathering for at least 20 seconds—that’s about the time it takes to hum "Happy Birthday" twice. This simple act is your number one defense against introducing any bacteria to the injection site.
Next, give your testosterone vial a quick inspection. You're looking for two critical things: the expiration date and the appearance of the liquid itself. The oil should be perfectly clear, with no crystals, cloudiness, or tiny particles floating around. If you see anything that looks off, don't use it. Contact your pharmacy right away.
A common mistake I see people make is forgetting to sterilize the vial's rubber stopper. Every single time you draw your medication, you need to vigorously wipe the rubber top with a fresh alcohol prep pad. Let it air dry for about 30 seconds. This kills any surface bacteria that could otherwise get pulled into the syringe along with the testosterone.
Drawing Your Precise Dose
Alright, now you're ready to draw your medication. This part can seem a little tricky at first, but a few pro tips make it a breeze. Most protocols suggest using a larger gauge "draw needle" (like an 18G) to pull the testosterone from the vial, then switching to a smaller "injection needle" (like a 23G or 25G) for the actual shot. This keeps the injection needle pristine and sharp, which makes the whole experience much more comfortable.
To avoid creating a vacuum in the vial that makes drawing the oil feel impossible, use this simple air-exchange technique:
- Pull Air In: First, pull back the syringe plunger to the mark of your prescribed dose. If your dose is 0.5 mL, pull in 0.5 mL of air.
- Inject Air Out: Now, insert the draw needle through the center of the sterilized rubber stopper and push all that air from the syringe into the vial.
- Draw the Oil: With the needle still in the vial, flip it upside down and slowly pull the plunger back, drawing the testosterone into the syringe until you have just a little bit more than your actual dose.
This air-exchange method equalizes the pressure inside the vial, allowing the thick oil to flow smoothly into the syringe. Drawing that little bit extra is a great trick that helps you get rid of any air bubbles without losing your medication.
Removing Air Bubbles and Final Checks
Air bubbles in your syringe are totally normal but also easy to fix. With the syringe still pointing needle-up, gently tap the side with your finger. You'll see any bubbles float up to the top. Once they've all gathered, slowly push the plunger just enough to expel the air. You’ll know you're done when a tiny bead of oil forms at the needle tip.
After you've pushed the air out, double-check that you have the exact dose remaining in the syringe. If you accidentally pushed out a bit too much oil, you can carefully draw a little more from the vial. Once the dose is perfect, you’re ready for the final prep step. Carefully twist off the large draw needle and replace it with your smaller, sterile injection needle. Just be sure you never touch the new needle with your fingers.
This methodical preparation is directly tied to the success of your therapy. Proper dosing and sterile technique are crucial, which is why understanding the importance of monitoring your testosterone replacement therapy is so beneficial for your long-term health. With your syringe now perfectly prepared, you are ready to select and prep your injection site.
Choosing and Rotating Your Injection Sites
Where you inject is just as critical as how you do it. Getting this right is fundamental to a comfortable and effective self-injection routine. Think of your body like a map—pinning the same spot over and over will wear it out, leading to problems that are surprisingly easy to avoid.
The key is to consistently rotate your injection sites.

There are two main ways to administer testosterone: into the muscle (intramuscular) or into the fatty tissue just under the skin (subcutaneous). Each method comes with its own recommended sites, and the best choice for you will hinge on your prescription, needle size, and personal comfort.
Comparing Intramuscular (IM) vs Subcutaneous (SubQ) Injections
Deciding between an IM or SubQ injection is a conversation to have with your doctor. Each method has its pros and cons, and what works perfectly for one person might not be ideal for another. To help you understand the landscape, we've put together a quick comparison of the two primary methods.
| Feature | Intramuscular (IM) Injection | Subcutaneous (SubQ) Injection |
|---|---|---|
| Target Tissue | Deep muscle tissue | Fatty layer just under the skin |
| Needle Size | Longer (typically 1 to 1.5 inches) | Shorter (typically 0.5 to 5/8 inches) |
| Common Sites | Ventrogluteal (hip), Vastus Lateralis (thigh) | Abdomen, thighs, upper buttocks |
| Absorption Rate | Generally faster due to high blood flow | Slower and more gradual |
| Pain Level | Can be more painful, risk of hitting a nerve | Generally less painful, lower risk of injury |
| Best For | Larger volumes of medication | Smaller, more frequent doses |
This table gives you a bird's-eye view of the key differences. Ultimately, the right approach will balance medical requirements with your own comfort and lifestyle, ensuring your therapy is as seamless as possible.
Intramuscular (IM) Injection Sites
When you perform an IM injection, you're delivering testosterone directly into large, dense muscles. These areas are rich with blood vessels, which allows for steady and reliable absorption. The trick is to pick muscles that are easy to reach and big enough to handle the medication without a problem.
The three most common IM sites are:
- Ventrogluteal (Hip): This is the gold standard. Medical professionals often prefer this site because it’s safely tucked away from major nerves and blood vessels.
- Vastus Lateralis (Thigh): For self-injection, this is one of the easiest spots to access. It's right there in front of you, making the whole process more straightforward.
- Dorsogluteal (Upper Buttock): While this was a popular site for decades, it’s now less recommended for self-injection. There's a risk of hitting the sciatic nerve, and it's just plain awkward to reach on your own.
Pro Tip: For self-injecting, stick with the ventrogluteal (hip) and vastus lateralis (thigh). These are your safest and most accessible options. Always make sure the muscle is relaxed before you inject; tensing up is a surefire way to make it hurt more.
Locating Your IM Injection Spots
Finding these spots on your body is much easier than it sounds. Here’s a quick guide to locating them yourself.
Finding the Ventrogluteal Site (Hip)
- Stand up and find the big bone on the side of your hip (this is the greater trochanter). Place the heel of your opposite hand on it. So, for your right hip, use your left hand.
- Point your thumb toward your groin and your index finger toward the front of your thigh.
- Now, spread your middle finger away from your index finger, creating a "V" shape.
- The sweet spot for the injection is that soft, fleshy area right in the middle of the "V".
Finding the Vastus Lateralis Site (Thigh)
- Sit down and look at your thigh. Mentally divide it into three equal sections between your knee and your hip.
- You’re aiming for the middle third section, right on the outer top surface of the muscle.
- This spot is perfect for beginners because it's so easy to see and reach. No twisting or turning required.
Subcutaneous (SubQ) Injection Sites
SubQ injections use a much smaller and thinner needle. Instead of going deep into the muscle, you’re just delivering the testosterone into the fatty layer right beneath the skin. Many people prefer this method, especially if they have some needle anxiety, and it can sometimes lead to more stable hormone levels.
The most common SubQ sites include:
- The Abdomen: Anywhere in the fatty tissue at least two inches away from your belly button.
- The Thighs: You can use the same general area as the vastus lateralis, but instead of targeting the deep muscle, you’ll gently pinch the fat.
- The Upper Buttocks: The fatty part of your upper buttocks is also an option, though it can be a bit harder to reach by yourself.
The Critical Importance of Site Rotation
Okay, here’s the most important rule of self-injecting: never use the exact same spot twice in a row. I can’t stress this enough. Sticking to one location is asking for trouble.
Your body is smart. If it senses repeated trauma in one area, it goes into defense mode and starts building up scar tissue. This fibrous tissue can make future injections more painful and, worse, it can dramatically reduce how well your body absorbs the testosterone. You could be doing everything else right, but poor rotation can make your therapy far less effective.
Another nasty issue is lipohypertrophy—a lumpy buildup of fat and scar tissue under the skin. It’s not just unsightly; it also messes with hormone absorption.
Creating a Simple Rotation Schedule
Don't overthink this. A simple, logical rotation plan is all you need to keep your injection sites healthy and effective for years to come.
Example Weekly Rotation Plan:
- Week 1: Right Thigh
- Week 2: Left Thigh
- Week 3: Right Hip (Ventrogluteal)
- Week 4: Left Hip (Ventrogluteal)
- Week 5: Start the cycle over.
You can even get more granular. Within your right thigh, for example, imagine a small grid. One time, inject in the upper-left part of the target zone; the next time you use that thigh, aim for the lower-right.
Keeping a simple log in a notebook or a note on your phone is a game-changer. It removes the guesswork and ensures you're giving each spot plenty of time to heal, which is crucial for long-term tissue health.
Mastering Your Injection Technique
Alright, with your syringe ready and your spot picked out, let's get to the main event: the injection itself. This is the part that usually causes the most jitters for anyone new to this, but I promise, it's a skill you can absolutely nail. The goal is to develop a smooth, confident motion that you can repeat every time.
Whether you're doing an intramuscular (IM) or a subcutaneous (SubQ) shot, the core principles are the same: stay in control and be precise. We'll walk through both methods, as the approach for each is a bit different. It’s not just about getting the testosterone in; it’s about doing it in a way that’s comfortable and effective. A few simple tricks can make a world of difference.
This graphic breaks down the three essential actions for any successful self-injection.
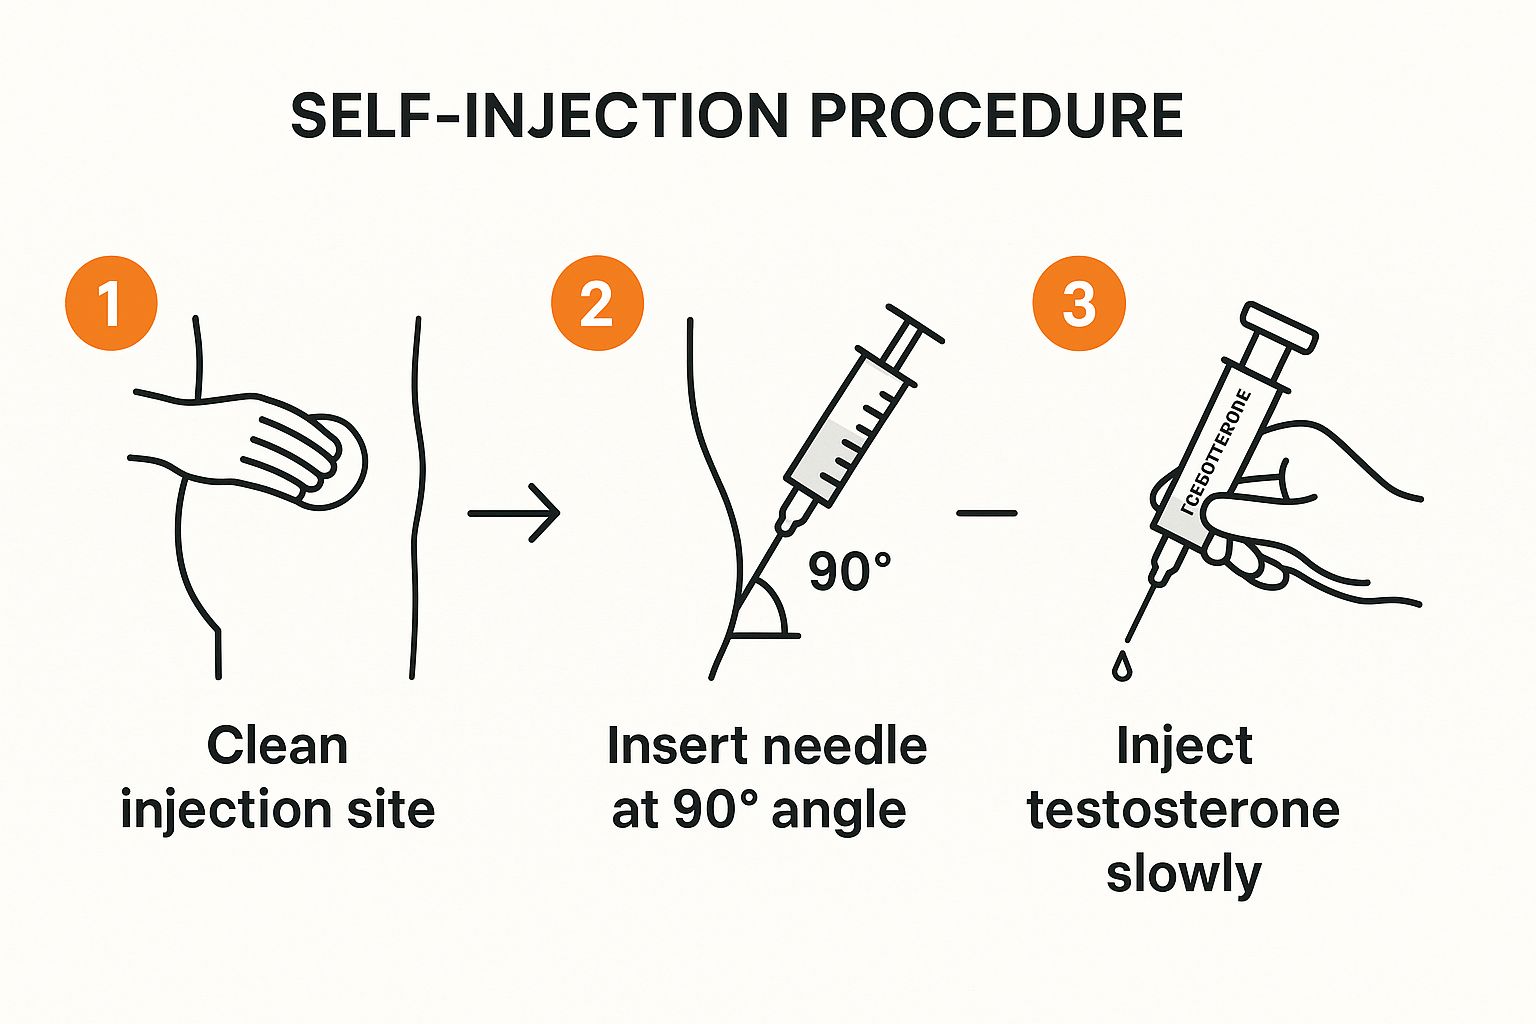
As you can see, it really boils down to three things: keeping it clean, getting the angle right, and maintaining a steady pace.
The Intramuscular (IM) Injection Method
IM injections send the testosterone deep into the muscle. Because you're going deeper, the technique requires more stability and a very specific angle. Many doctors will teach you the Z-track method for IM shots, which is a clever technique designed to "lock" the medication in the muscle and stop it from leaking back out.
Here’s how to do an IM injection using this tried-and-true method:
- Prep the Site: Once you’ve cleaned the area with an alcohol pad and let it air dry, use the side of your non-dominant hand to gently pull the skin and the fatty tissue underneath about an inch to the side. Keep a firm but gentle hold on it.
- Insert the Needle: Hold the syringe like a dart in your dominant hand, positioned at a perfect 90-degree angle to your skin. In one quick, smooth motion, insert the needle all the way into the muscle. Trust me, hesitating is what makes it hurt more. Just commit to the motion.
- Inject the Testosterone: With the needle in place, slowly and steadily push the plunger down. A good pace to aim for is about 10 seconds per milliliter. This slow, controlled speed prevents pressure from building up in the muscle, which is a common cause of post-injection soreness.
- Withdraw and Release: After the syringe is empty, pause for a second before pulling the needle straight out. The moment the needle is clear, let go of the skin you were holding aside. That action creates a "Z" shaped path, sealing the medication inside the muscle.
It's completely normal to see a tiny drop of blood or even a bit of oil at the site—don't panic. Just apply gentle pressure with a clean cotton ball for a few seconds. Whatever you do, don't rub the area. That will only cause irritation.
The Subcutaneous (SubQ) Injection Method
SubQ injections are often seen as less intimidating because they use a much shorter, thinner needle and only go into the fatty tissue just under the skin. This method has become incredibly popular for testosterone therapy.
And for good reason—research backs it up. SubQ injections provide stable, therapeutic testosterone levels. A 2017 study showed that weekly SubQ shots kept testosterone levels well within the normal range for most guys. The data also confirmed a strong dose-dependent response, with a clear correlation between the weekly dose and serum levels (r^2 = 0.59).
The SubQ technique is a little different, as it focuses on pinching the skin to isolate that fatty layer.
- Prep the Site: First things first, clean your chosen spot—usually the abdomen or thigh—with an alcohol pad and let it dry completely.
- Pinch the Skin: With your non-dominant hand, gently pinch about an inch of skin and fat between your thumb and forefinger. This lifts the fatty tissue up and away from the muscle below.
- Insert the Needle: Holding the syringe in your dominant hand, insert the needle into the pinched-up skin. The angle can be either 90 degrees (straight in) or 45 degrees. This usually depends on how much body fat you have in that area and what your doctor advises.
- Inject the Medication: Slowly push the plunger all the way down. Once the syringe is empty, you can let go of the pinch and then smoothly pull the needle out.
If you'd like a more detailed breakdown of both methods and some extra safety pointers, check out our complete guide on how to master self-administering testosterone injections safely.
Real-World Tips for a Better Injection Experience
Beyond the clinical steps, a few tricks from guys who’ve been doing this for years can turn an intimidating task into a simple, two-minute routine. Building these small habits makes all the difference.
Comfort and Technique Tips
- Relax the Muscle: This is a big one for IM shots. Before you inject, put all your weight on the opposite leg. This ensures the target muscle is totally relaxed. A tensed muscle is a recipe for a painful shot.
- Numb the Area: If you’re sensitive to the needle prick, hold an ice cube on the injection site for about 30-60 seconds beforehand. It can numb the skin just enough that you barely feel a thing.
- Let the Alcohol Dry: Never, ever inject while the alcohol is still wet on your skin. That’s the number one cause of stinging. Give it a full 30 seconds to air dry for a pain-free experience.
- Warm the Oil: Some guys swear by this. Hold the testosterone vial in your hands or pocket for a few minutes before drawing. This warms the oil, making it less thick and way easier to inject smoothly.
What to Do After the Injection: Site Care and Safe Disposal
Alright, you’ve done the hard part. The needle is out. But what you do in these next few moments is just as crucial as the injection itself. This final phase is all about taking care of the injection site and, just as importantly, getting rid of your used supplies safely and responsibly.
Getting this right isn't just a suggestion; it's a critical step that protects you, anyone you live with, and the wider community.
The very first thing you need to do, as soon as that needle is withdrawn, is to place it and the syringe directly into your sharps container. Don't even think about recapping it. Trying to get that tiny cap back on a used needle is how most accidental needlestick injuries happen, and the risk is highest right now.
With the needle safely out of the way, you can now focus on the injection site.
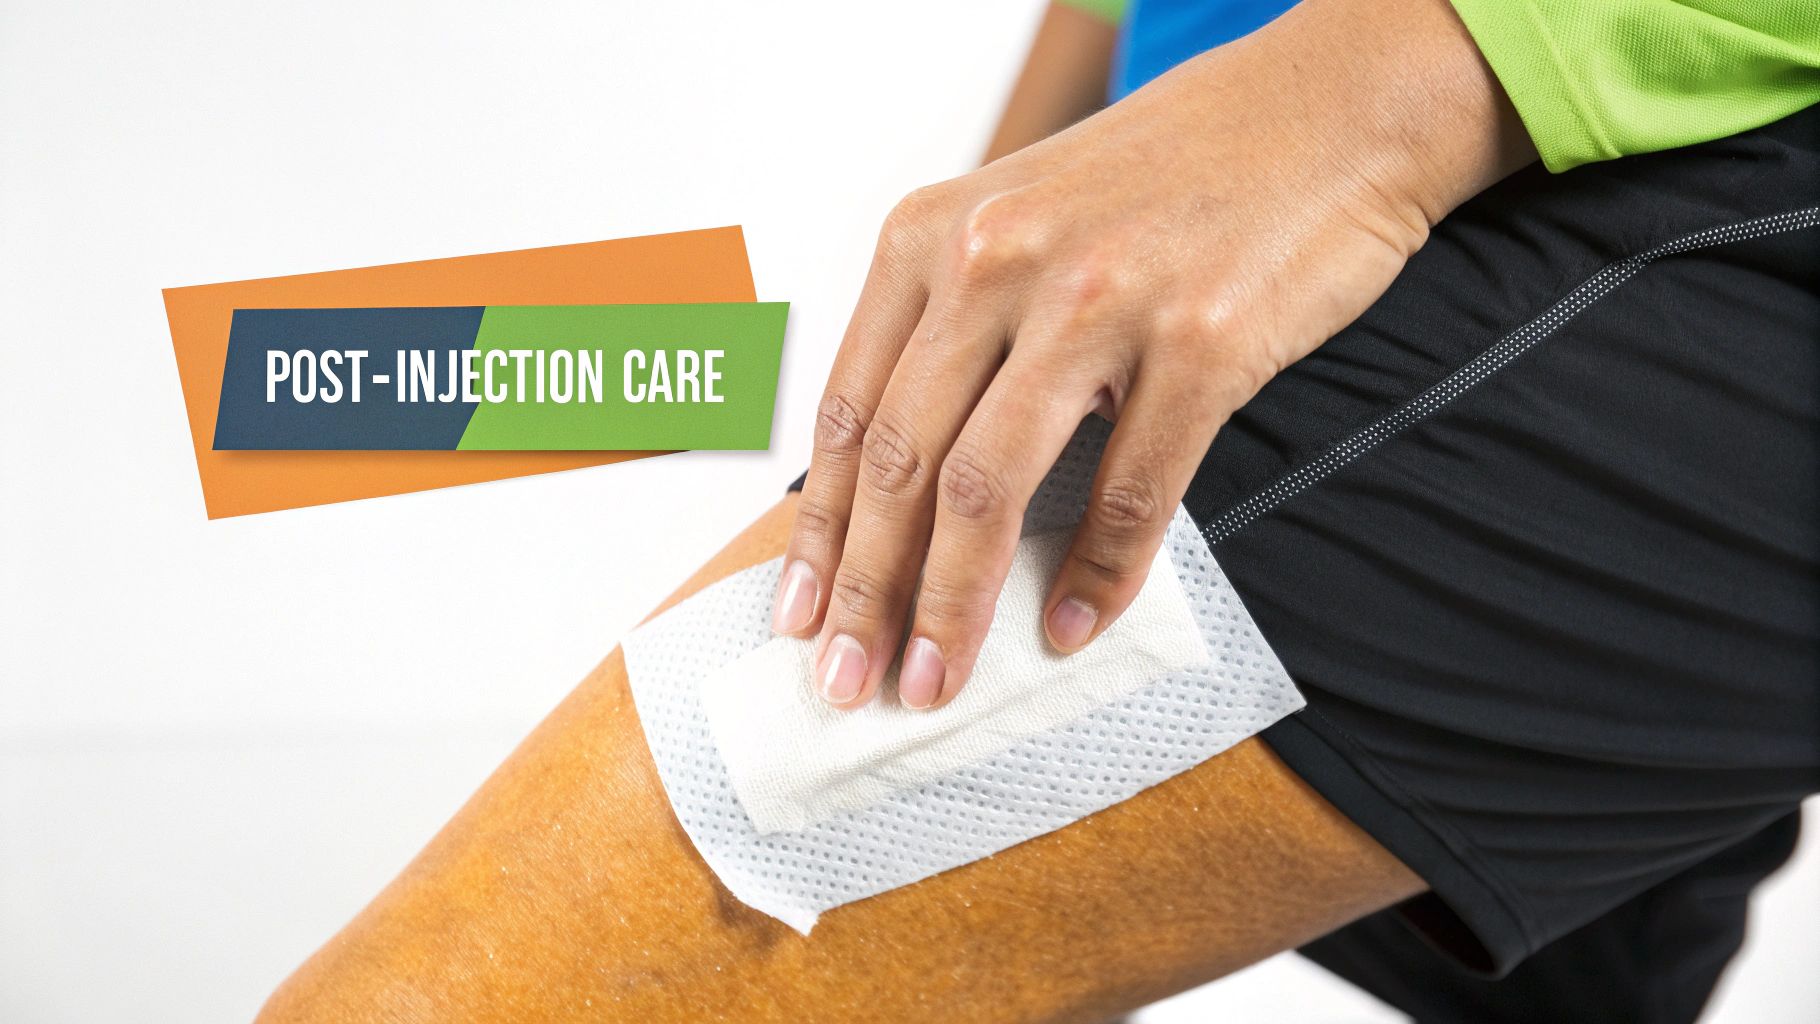
Immediate Site Care
It is completely normal to see a tiny dot of blood or maybe even a small bead of the testosterone oil where the needle was. Don't worry about it. Just grab a clean cotton ball or a piece of gauze and apply gentle pressure for about 30 seconds.
Whatever you do, don't rub or massage the area. This can irritate the skin and might make bruising or soreness worse. The only goal here is to stop any minor bleeding and keep things clean. You can pop a small bandage on it if you like, which is a good idea to prevent your clothes from rubbing against the spot.
After a minute or two, you're all done with site care. Over the next day or so, just keep an eye on the area. A little bit of redness, tenderness, or even a small, firm lump under the skin is pretty common and almost always goes away on its own. Still, you need to be aware of the signs of a more serious reaction.
When to Call Your Doctor
Infection is rare, but it's a risk with any injection. You need to contact your healthcare provider if you notice significant swelling, severe pain that doesn't get better, warmth at the injection site, or any signs of pus or discharge.
The Non-Negotiable Rules of Sharps Disposal
Properly disposing of your used needles and syringes is an absolute must. This isn't optional. Used sharps are considered biohazardous waste because they can transmit serious infections if someone gets accidentally stuck. Never, ever just toss them into your regular trash can or recycling bin.
Your disposal plan needs to follow these simple rules:
- Use an Approved Container: You have to use an FDA-cleared sharps container. They are made from puncture-resistant plastic and have a lid that seals securely. No exceptions.
- Don't Overfill It: These containers have a "fill line" on the side for a reason, which is usually about three-quarters of the way up. Filling it past that line creates a serious safety hazard for anyone who has to handle it.
- Find a Local Disposal Program: Once your container is full, you can't just put it out with the trash. Your options will depend on where you live, but they often include community drop-off sites (like at a fire station or pharmacy), mail-back programs, or special waste pickup services. The best place to get specific guidance for your area is your local health department or pharmacy.
Common Questions About Self Injecting Testosterone
Even with the best guide in hand, a few questions are bound to pop up once you start self-injecting testosterone. That’s a completely normal part of the process, and getting clear answers is what builds real confidence. Below, we're tackling some of the most common concerns and practical hiccups that come up, offering straightforward advice to help you manage your therapy safely and effectively.
Think of this as your go-to resource for those "what if" moments. From what to do if you miss a dose to dealing with a bit of needle anxiety, we’ve got you covered.
What Should I Do If I Miss a Dose?
Life happens. At some point, you might forget an injection or be unable to do it on your scheduled day. The most important thing is to stay calm and never, ever double up on your next dose to compensate.
If you remember within a day or two of your scheduled injection, you can typically take it as soon as you realize. From there, just get back on your regular schedule for the following week. However, if it’s almost time for your next dose anyway, it's often better to just skip the missed one entirely and wait. Jamming two doses close together to "catch up" is a bad idea, as it can cause a significant and unpleasant spike in your hormone levels.
A good rule of thumb: If you're more than halfway to your next scheduled injection, it's generally best to skip the missed dose. When in doubt, a quick call to your doctor is always the smartest move. They can give you advice tailored to your specific treatment plan.
Is Post-Injection Soreness Normal?
Yes, feeling some mild soreness or tenderness at the injection site is very common. This is especially true when you're new to self-injecting or when performing an intramuscular (IM) shot. The discomfort usually comes from the needle piercing the skin and muscle, plus the oil-based medication creating a small depot in the tissue as it waits to be absorbed.
The soreness usually feels like a dull ache, a lot like how your muscle feels after a flu shot, and it should clear up within a day or two.
To keep this to a minimum:
- Make sure the muscle is totally relaxed during the injection. Tensing up is a surefire way to make it hurt more.
- Inject the medication slowly and steadily—don’t rush it.
- Let the alcohol on your skin dry completely before injecting. This helps avoid that sharp stinging sensation.
- Diligently rotate your injection sites. Giving each spot a break prevents tissue fatigue and soreness.
How Can I Overcome Needle Anxiety?
A fear of needles is incredibly common, but it absolutely does not have to be a barrier to managing your own TRT. Plenty of people successfully work through this anxiety with a few practical strategies.
One really effective technique is to numb the area with ice for about a minute before you clean it with an alcohol pad. This can significantly dull the initial pricking sensation. Another fantastic approach is to practice deep, controlled breathing right before and during the injection to calm your nervous system. Some guys also find that putting on music or a podcast in the background provides a welcome distraction.
Remember, the more you do it, the more routine and less intimidating it becomes. Your confidence will build with each successful injection.
Traveling Safely with Testosterone and Supplies
Traveling with your TRT supplies is completely manageable, it just takes a little planning. The key is to keep everything organized and documented.
- Keep Meds in Original Packaging: Always travel with your testosterone vial in its original pharmacy-labeled box. This is non-negotiable.
- Get a Doctor's Note: Carry a letter from your prescribing doctor that explains your medical need for testosterone and the associated supplies (needles, syringes, etc.).
- Pack in Your Carry-On: Never, ever put your medication in checked luggage. The temperature extremes in the cargo hold can damage the testosterone, and there’s always the risk of your bag getting lost.
- Check Regulations: If you're flying internationally, do a quick search on the specific regulations for carrying controlled substances into your destination country beforehand.
With the right documentation, you shouldn't have any trouble with airport security.
Injectable testosterone has long been the gold standard for TRT, largely due to its high effectiveness and affordability. A landmark 2013 study found that roughly 53% of patients on TRT chose injections, easily surpassing gels (31%) and pellets (17%). This method typically involves a dose of around 200 mg every one to three weeks, which creates a predictable "peak and valley" effect on hormone levels. You can dig into the findings from this TRT modality research to understand more of its clinical implications.
Knowing these practical details helps you manage your therapy like a pro. And if you're interested in other ways to support your hormone health, our guide on the science-based secrets to boosting testosterone levels offers fantastic insights that complement any treatment plan.
At Elite Bioscience, we provide the resources and therapies to help you take control of your health with confidence. Our team is dedicated to supporting you through every step of your journey, ensuring you have access to safe, effective, and convenient treatments tailored to your needs. Discover how our TRT and wellness programs can help you achieve your goals by visiting https://elitebioscience.co.